The Path to Professional License: Isabellah von Trapp, LG

In the science and engineering industry, seeing a “PE”, “LG”, “PMP”, or other initials behind someone’s name shows that person went through years of work experience that culminated in a substantial test to confirm the right to practice their area of technical expertise. A professional license is a proof statement that communicates that the people charged with designing roads and buildings; solving water supply challenges; cleaning up contaminated soil and water; and successfully managing project quality are qualified and ethically accountable professionals. Many go through this licensing journey but few outside that group know what the process is really like.

We’re telling those stories here. Aspect’s professionals are writing a series of articles that capture the trials and successes of studying for and receiving these career-defining milestones.

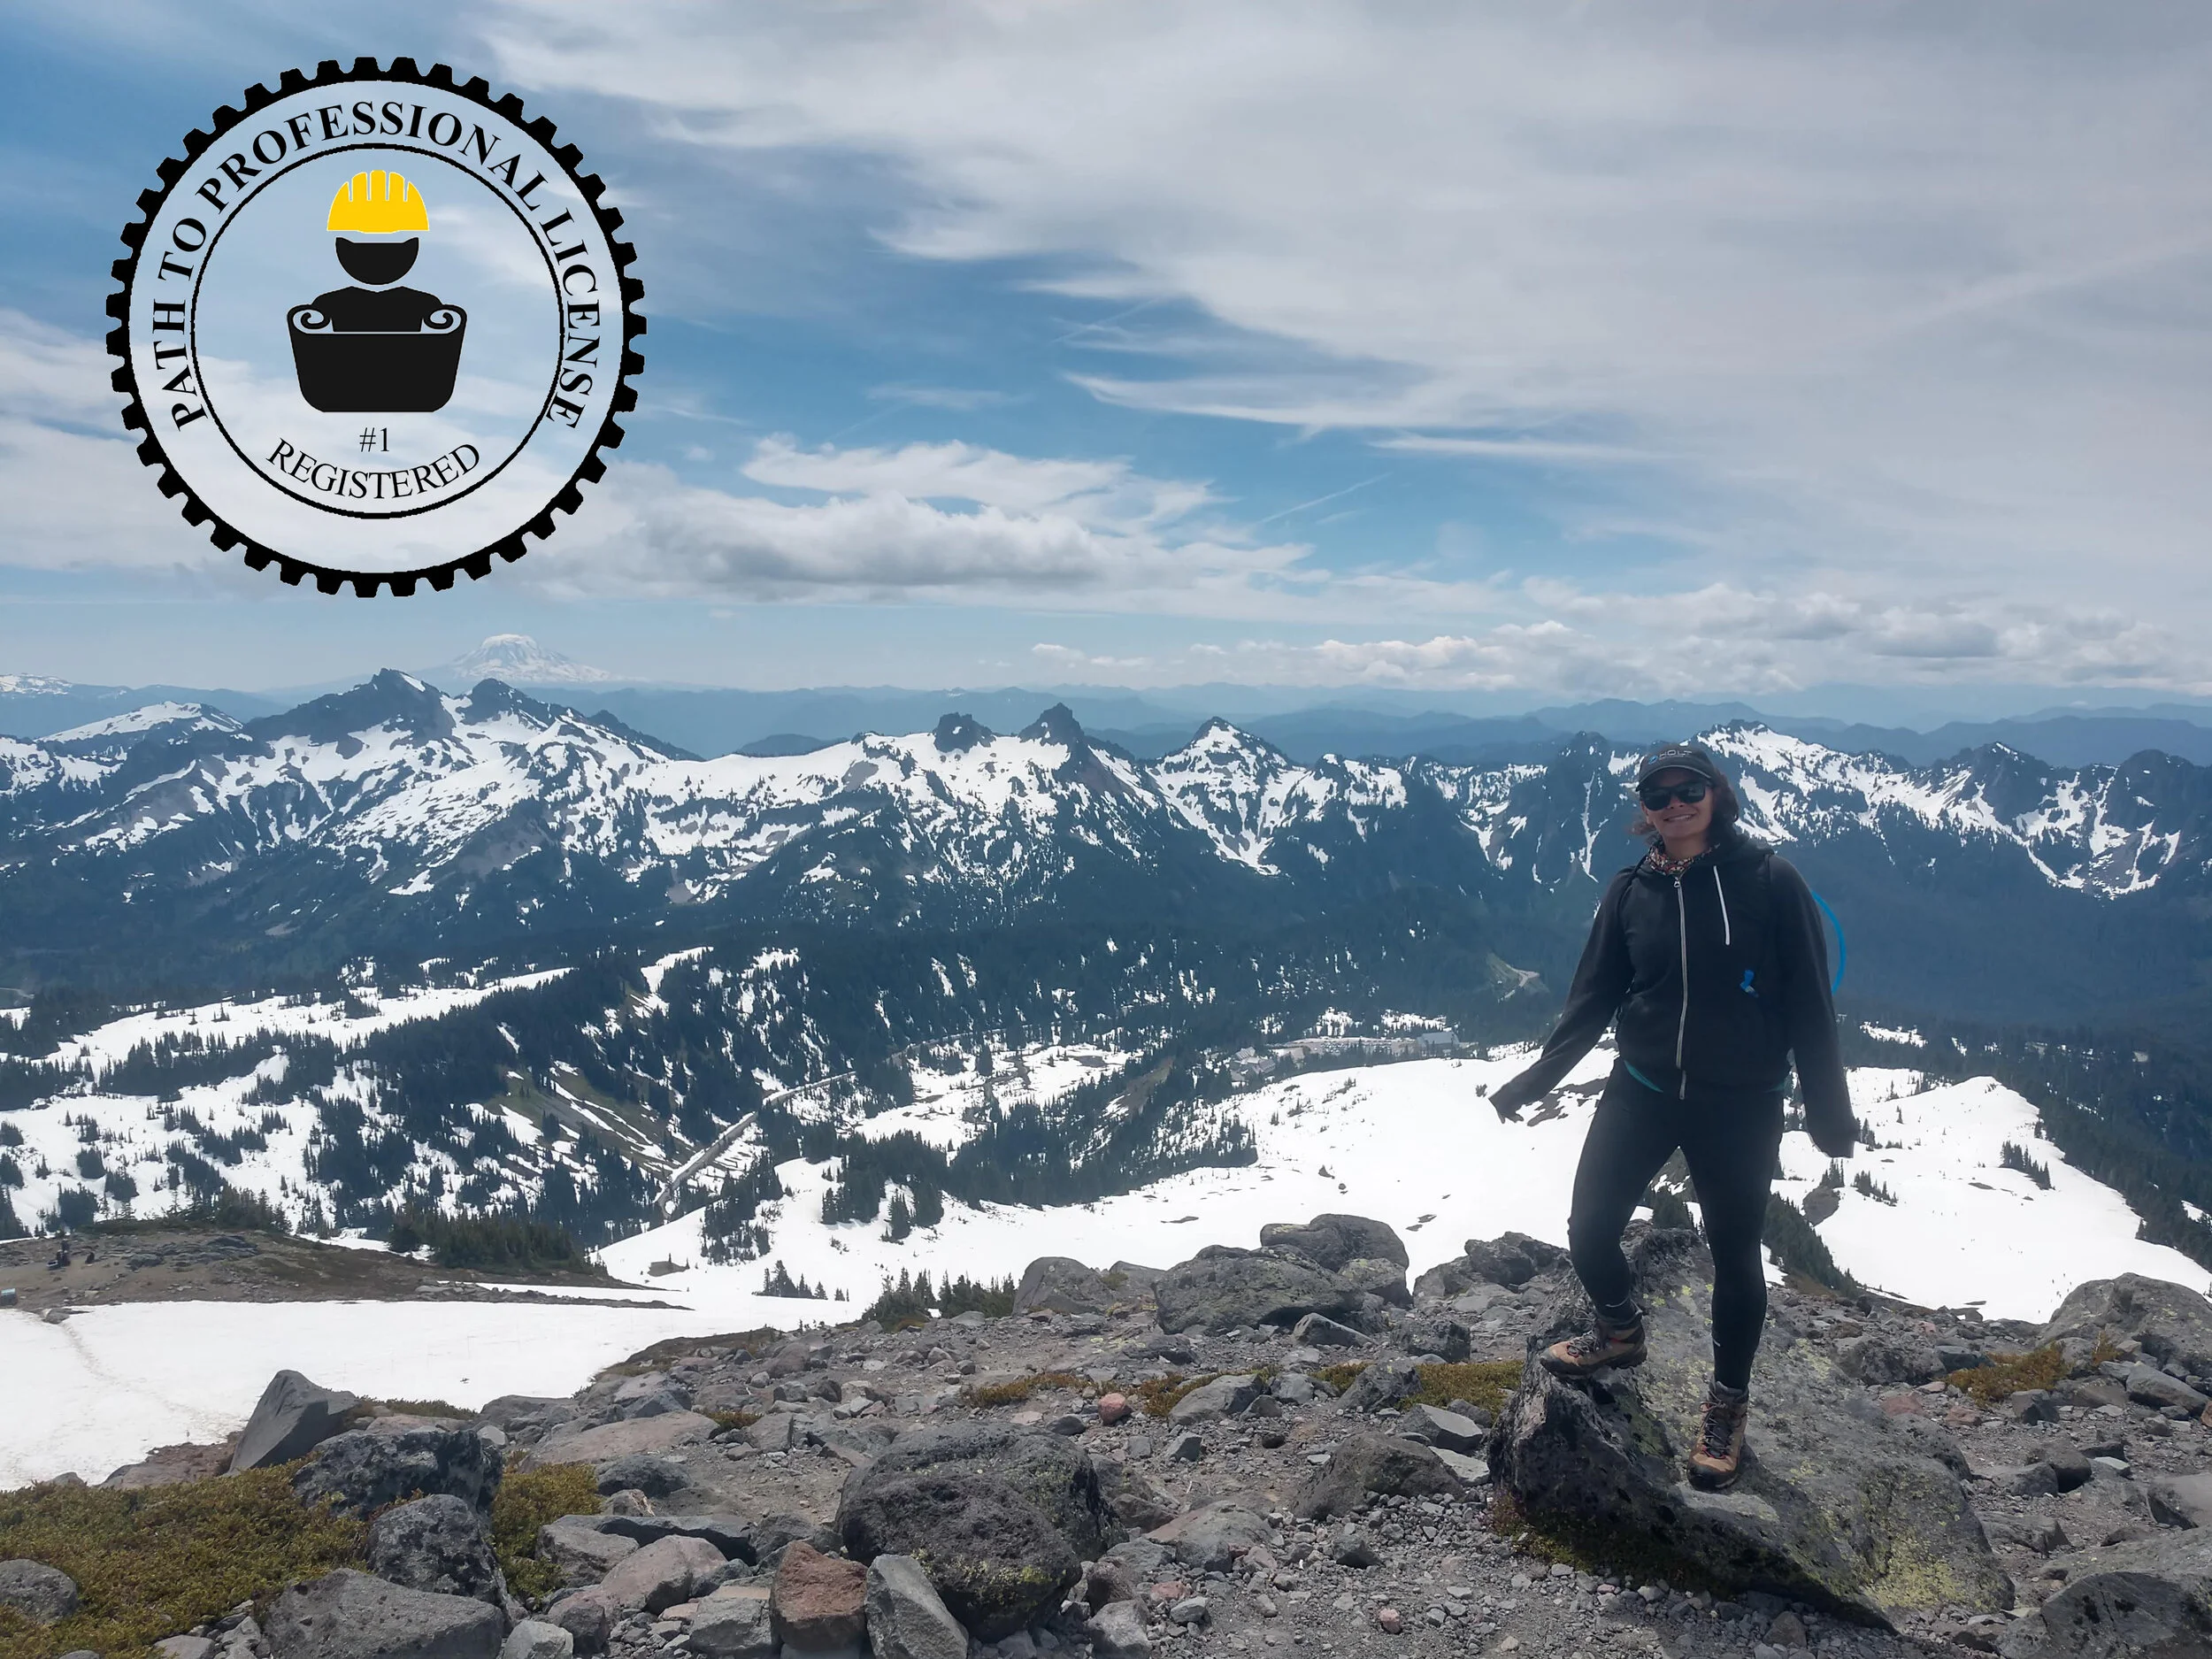
Isabellah von Trapp, Licensed Geologist (LG)

Test taken: October 2021

Results given: November 2021

Isabellah at Mt. Rainier demonstrating how she felt when she received her LG exam results.

Where did you start with your test prep?

I got out some construction paper and my favorite markers and drew a big, beautiful geologic time scale and geologic diagrams (e.g., fault blocks, Bowen’s Reaction Series, etc.). I hung them on the wall adjacent to my desk so it would be a constant reminder to study. Helpful? Not really. But it was a nice and fun way to ease into reviewing what initially felt like a very daunting amount of material.

What were your study tactics?

Practice tests, reviewing the study guide, flipping through flash cards, desperately seeking ASBOG advice on Reddit (r/geologycareers for curious minds), etc.

Walk us through the Big Test Day…

I woke up around 8 am. The test didn’t begin until early afternoon, so I tried to sleep in as much as my body would let me. Despite the nerves and not feeling hungry at all, I forced myself to eat something. I opted for oatmeal, a clementine, and some coffee. I put on my favorite jeans (for style) and favorite flannel (for comfort). Perhaps unsurprisingly for a geology exam, the exam room, as I would later find out, was full of people in very similar outfits.

Having an intense fear of being late, I left Seattle around 9:30 am for a 1pm exam in Olympia. On the drive down I listed to all my favorite music. Upon arrival, my extra time – given the dramatically early arrival – was spent reviewing the study guide in my car. I don’t think I learned anything new at that point but it eased my mind to have one last look at things.

There was a lot of nervous energy in the exam room leading up to the test. I remember the first page of questions being fairly easy, which inspired initial confidence, but they seemingly got harder as the exam progressed. Afterwards, I genuinely felt pretty bad about the way it went. I drove home semi-deflated but happy to be done in the interim. Later that evening I met my friends at a cabin on a lake for the weekend. It was nice to get my mind off the test.

How did you feel when you got the results?

Honestly, I was shocked. One of my old college classmates took the exam at the same time. He called me one Thursday night (after I had just landed in New Orleans for a short, extended weekend vacation) to see how I did as he had just received his passing results. Anxious, I checked my email. Nothing! I refreshed my email approximately every 10 minutes for a few hours but didn’t hear anything that evening. At this point, I assumed I failed and would be a recipient of the “We regret to inform you” email the next day. Much to my delight, I got a congratulatory email and a digital copy of my newly minted license the next day. A sunny Friday in New Orleans was the perfect time and place to receive this news. You can bet I took myself out for a beer (or two) after that!

What was the best piece(s) of advice you got from others who’d done this before?

  • Life does in fact go on if you don’t pass the exam on the first try.

  • Even if you do pass, you will probably feel like you didn’t afterwards so there’s no sense in stressing during the approximate 45-day period it takes to get your results. Think “ignorance is bliss” purgatory.

What should a person gearing up to do this know about the mental, physical, and social challenges of test prep?

Depending on how you study/absorb material, you probably won’t have much of a life for a month or two leading up to the test. However, you probably will not set yourself up for success if your mental batteries are drained at the expense of your physical and social health. I think it’s critically important to give yourself a break. About 3 weeks before my exam, I skipped a weekend study session to go backpacking through the Enchantments with my friends. This was probably the best thing I could have done.  

Any parting advice for those getting ready to embark on this journey?

The LG exam is offered twice per year – once in March and again in October. If possible, try to take the exam in March so you can spend the rainy winter months inside studying instead of the coveted, sunny, August/September days. Also, have a treat on deck to enjoy immediately after the exam is finished. I did not anticipate how hungry I would be afterwards. Unfortunately, I did not heed either piece of my own advice in this instance, but that is okay. Hindsight is indeed 2020.

A Soil Infiltration Cookbook: How Deep Does Your Water Go?

Street Flooding Due to Failing Infiltration Systems – Yakima, Washington (Source: Aspect Consulting)

The Pacific Northwest recognized early on the negative effects of urbanization on receiving waters and has been a leader in the stormwater management field for decades. This was initially driven by concerns about the impacts of urban runoff on threatened and endangered species in the Puget Sound area, and later reinforced by the National Pollutant Discharge Elimination System (NPDES) permitting program.

More recently, a study led by the University of Washington solved the mystery of why Coho salmon are dying in urban streams before spawning. As many suspected, stormwater runoff is the culprit. It was found that runoff from high traffic areas contains a tire-related chemical that is toxic to Coho.

As the science of stormwater management continues to progress, practitioners must learn about and apply the latest techniques, including the use of stormwater infiltration. While infiltration is not really a new concept, widespread infiltration design is new for some areas and some water quality designers. When infiltration systems fail, the consequences can range from increased pollutant loading and erosion in streams to flooded roads, businesses, and homes. 

Infiltration Design For Cleaner Water and Better Habitat

Many agencies operate stormwater programs under NPDES Municipal Separate Storm Sewer System Permits (MS4 Permits). MS4 Permits require development projects within the permittee’s jurisdiction to include permanent Best Management Practices (BMPs) to reduce stormwater pollution and flow-related problems. Permanent BMPs typically include detention vaults, filters, and bioretention basins.

Over the last decade, MS4 Permits have started requiring the use of infiltration BMPs to mitigate the hydrologic and water quality impacts of development. From a surface water perspective, infiltrated runoff does not cause stream erosion, has no pollutant loading, and helps recharge groundwater.

Using Infiltration to Reduce Hydrologic and Water Quality Impacts (Source: Aspect Consulting)

Lessons Learned from the Track Record of Filtration and Infiltration

Much like the early application of other stormwater BMPs, some designers don’t have a technical background in infiltration. Numerical models, simplifying assumptions, and step-by-step procedures make applying infiltration feasible for generalists, but there are some key issues to consider.

Accurately Estimating Infiltration Rates. The starting point for designing an infiltration BMP is determining the infiltration rate your BMP is expected to have. Allowable methods have changed over the years, with some agencies requiring in-situ infiltration testing for all infiltration BMPs, and some allowing “grain size methods” to estimate rates in certain cases. It’s recommended to only use grain size methods for screening purposes when soils meet all criteria for application of the equation being used.

Reliance on grain size method results can backfire, which is why in-situ infiltration testing must be done to support the design process, with knowledgeable analysis of testing results. The number of infiltration tests should scale with the size, complexity, and soil heterogeneity of the project site. Thoughtful testing and analysis methods can also indicate if groundwater was mounding during the test, and whether a formal mounding analysis is needed.

Once correction (safety) factors are applied, there are generally two ways an infiltration rate is used to help model and design infiltration BMPs: (a) assume the infiltration rate is constant during BMP filling and emptying; or (b) assume the infiltration rate varies (typically linearly) with water depth (pressure head) above the infiltration surface. Knowing how the infiltration BMP will be sized is important when analyzing test data because the resulting constant infiltration rate will not necessarily be the same value as the variable rate.

Extreme plugging/sediment loading to a proprietary stormwater filter (Source: Oregon Department of Transportation, Operation and Maintenance Manual, DFI No.: D00183, 2011)

Plan to Manage Plugging. Infiltration BMPs are susceptible to the same plugging by stormwater sediments and biofouling that stormwater filters are. Stormwater filters plug up and infiltrating into soil is like infiltrating into a filter. Therefore, pre-treatment to remove sediment is necessary to prolong the life of infiltration BMPs.

Plugging of the infiltration surface is the main reason safety factors are used when sizing infiltration BMPs. Stormwater manuals often prescribe safety factors, but the safety factor really should scale based on the soil being infiltrated into.

For instance, when infiltrating slowly into a fine soil with a permeability not much higher than stormwater sediment, reducing the measured rate by a factor of 2-4 is acceptable. But when infiltrating into coarser soil with a permeability much greater than stormwater sediment, a larger safety factor is warranted (some jurisdictions do set a maximum design infiltration rate). The level of treatment for sediment removal prior to infiltration should affect the safety factor too.

Check and Address Groundwater Mounding. Infiltrating runoff sometimes causes groundwater mounding. As mounding increases, it can reduce the infiltration rate, cause seepage problems, and raise regulatory compliance concerns. We recommend monitoring groundwater during infiltration testing to see if it rises in response to the test. If so, the data can be used to help calibrate a mounding model. In cases where mounding is an issue, a formal analysis and modeling (such as USGS’s MODFLOW) of the receptor soil/aquifer combination should be done and infiltration BMP flowrates and spacing fine-tuned to avoid mounding problems.

Increasing Focus on Deep Infiltration to Meet Low Impact Development Goals

The use of “deep” infiltration to meet project Low Impact Development and flow control requirements has been increasing, particularly where surface soils have low permeability but overlie an unsaturated higher permeability soil. It can be feasible to bore through the surface soil and install an infiltration well in a more permeable receptor soil. Stormwater runoff is routed into the well and infiltrated into the receptor soil.

Simplified Deep Infiltration Schematic (Source: Aspect Consulting)

The concept of deep infiltration is straight forward but a system that reliably functions for decades requires some careful thought. To prevent plugging, it’s critical to keep sediment out of deep infiltration wells. However, normally some runoff is allowed to bypass treatment BMPs during large storms. Directing untreated flow into infiltration wells will reduce their service life. Another consideration is whether advance BMPs can be a source of initial sediment loading including: Is that drain rock really clean? Should I specify on-site washing of drain rock? Will my bioretention mix initially leach sediment? Should I flush the system before connecting to infiltration BMPs?

We recommend designing deep infiltration wells to:

  • Include treatment to remove sediment for
    all flows to the well

  • Control the rate of flow into the well to
    the design rate

  • Reserve head to allow water levels to rise to counteract plugging

  • Prevent baseflows from entering infiltration wells

  • Ensure the system drains down in a
    reasonable time

Using the ‘Infiltration Cookbook’: Infiltration System SOPs

Consistent and successful stormwater infiltration requires clear and comprehensive guidance for planning through construction. As part of the team preparing an updated LID Manual for the Port of Seattle’s Seattle-Tacoma International Airport (STIA), Aspect developed Standard Operating Procedures (SOPs) for shallow and deep infiltration systems. The detailed SOPs for the Port of Seattle— both for shallow and deep infiltration — are publicly available and are a good example of a successful ‘cookbook’ for creating sustainable infiltration design.

SOPs provide guidance for planning, testing, analysis, design, and construction of infiltration facilities. Recommended SOP steps for deep infiltration are shown here:

For more information about soil infiltration best practices for water quality and stormwater issues, contact John Knutson.

An edited version of this article appeared in the February 2022 version of Stormwater Magazine.

How 300 SNOTEL Sites Forecast the Pacific Northwest’s Annual Water Future – Part 1

Nearly 300 climate monitoring stations (SNOTEL sites) scattered across Washington state hold the data to our largest and most valuable reservoir: The Winter Snowpack. As of early February 2022, our water year began typically but has trended warm. We did get plenty of snow in the Cascades and Olympics – the critical mountain ranges that store our state’s water future. Read on for Part 1 of our two-part series, where we’ll distill the SNOTEL data, and then come back in the spring to see how the 2022 snowpack fed water resources in the Pacific Northwest.

A look at Mount Shuksan during some backcountry ski touring. This area around Mount Baker receives some of the highest snowfall in the Pacific Northwest. In the spring, the melting snowpack feeds major rivers in Northwest Washington, across Whatcom and Skagit County.

Snowpack is the Key to Fish, Flows, and Agriculture

Snowpack is vital to Washington’s water supply; we all depend on this resource as it piles in our mountains in the winter and melts in the spring to replenish streams and groundwater. Its impact is counted on by:

  • Farmers – To grow crops with irrigation water from streams fed by snowpack

  • Cities and Counties – To supply homes from groundwater replenished by snowpack

  • Industries – To generate hydroelectric power from rivers fed by snowpack

  • Salmon – To feed cool and clear water to critical fish habitat

Winters of below-normal snowpack add strain to the teetering balance of water supply and demand and challenge water managers throughout the state. Fortunately, this strain does not come as a blindside because of the SNOTEL network.

Basin-filled map showing percent of median across Washington State on February 1, 2022.

SNOTEL Surveys Washington’s Water Future

A growing network of nearly 300 climate stations (SNOTEL sites, short for SNOwpack TELemetry) monitor our changing snowpack reservoir in real-time, revealing whether the snowpack is below- or above-normal. This is managed by the U.S. Department of Agriculture, who provide this free publically available data. This allows regulatory agencies to make early decisions to manage the level of risk in receiving more or less water than planned for in spring, when the ‘reservoir’ stored in the snow transforms into streamflow that replenishes rivers and groundwater basins throughout the state.

Snow Water Equivalent – Not Just for Skiers and Boarders

Many people may associate snowpack in terms of snow depth. However, in the context of water supply to fish/flows/communities, of greater importance is the snow water equivalent (SWE). If you take a volume of snow and melt it, the volume of water left is SWE. SWE is a better measure of how much water is available in the spring meltout. The water content of falling snow can be highly variable: five feet of dry powdery snow is not equivalent to five feet of wet heavy snow.

How’s it looking? A Summary of Washington February 2022 Snowpack

Water year 2022 (‘Water Year’ always starts on October 1 annually, unlike the calendar year) began typical and uneventful; however, by mid-November, a battering of atmospheric rivers delivered warm and wet conditions to the state. While rainfall records were shattered (wettest fall in recorded Seattle history), warm temperatures quickly erased any progress of previous snowpack development and the 2022 snowpack (the black line) initially fell under the normal line (see green line below). As we crossed into December, the snowpack regained momentum, crossing above the normal line.  By January and into February, the state’s snowpack plateaued, ending right at the normal values, to date.  

Snow Water Equivalent (SWE) in Pacific Northwest Region. The black line shows 2022 SWE trends to date. The green line shows normal “median” snowpack blue and red lines show the max and min (% median).

As of early February 2022, the Pacific Northwest snowpack is 102 percent of normal. In Washington, the highest reading of SNOTEL data in the State were at 109 percent of normal in the Lower Columbia Basin. The Lower Yakima has the lowest reading at 83 percent of normal.

Using SNOTEL to See Our Water Reservoir Forecast

As the SNOTEL data illuminates, our snowpack story is fluid. This year, so far, is trending around normal. However, the value of having 300 monitoring stations is mountains of data to measure our state’s water health. This gets more and more important as the weather turns warmer and farmers, fish, and communities seek out the meltout from the reservoirs in the mountains. Check back in April 2022 for Part 2 of our SNOTEL water summary where we’ll look back at how our 2022 snowpack reservoir turned out.

The Path to Professional License: James Packman, PMP

In the science and engineering industry, seeing a “PE”, “LG”, “PMP”, or other initials behind someone’s name shows that person went through years of work experience that culminated in a substantial test to confirm the right to practice their area of technical expertise. Many go through this licensing journey but few outside that group know what the process is really like.

We’re telling those stories here. Aspect’s professionals are writing a series of articles that capture the trials and successes of studying for and receiving these career-defining milestones.

James Packman, Project Management Professional (PMP)

Test taken: September 2021

Results given: About 10 seconds after completing the exam (it’s a long and nervous 10 seconds)

James hiking in the Enchantments

Tell us a little about the PMP program. How long does it take?

To qualify to take the PMP exam, one must have 36 months of experience leading projects (60 months if no 4-year college degree) and take a 35-hour prep course. There are many companies that offer PMP prep courses; I chose to take it from Project Management Academy (PMA). The course was live online over 2 weeks. The PMA prep course costs a little more than some other vendors, but they have good online resources, which I used extensively for independent study after the prep course.

After the prep course, I studied for about 4 months before I was ready to take the exam. This was longer than I anticipated partly because I had a challenging personal issue occur (the death of a close friend). I also followed PMA’s advice to keep taking practice exams until you score 80 percent or higher. But in hindsight, I found that the actual exam questions tended to be much simpler than the practice exam questions. Most of the charts, equations, and management models covered in the prep materials weren’t on my exam. Maybe this helped prepare me well, but I think I ended up over-studying.

What was the best piece of advice you got as you started the certification?

Study at least a little bit several days a week. There’s so much information to learn, it helps to build the knowledge in small pieces and reinforce it with frequent study.

What should a person gearing up to do this know about the mental, physical, and social challenges of certification?

For fellow Aspect staff who are considering PMP certification, they should know that only some of the content applies to the types of projects we do at Aspect. Skills like communication, budget management, and leadership apply to every project. But many of the technical project management skills covered in the PMP material are used more widely in other industries, such as manufacturing, software development, and construction.

In some of those other industries, Agile and related approaches, such as Lean, are widely used for managing projects. These methodologies complete work incrementally and/or iteratively from a backlog that is developed during the project. Most of the projects we do at Aspect are what are known as Predictive or Waterfall in the project management world: we scope out the entire project at the beginning and then implement it based upon an agreed budget (here’s a handy article that compares the Agile and Waterfall methodologies).

I find that the project management approach is largely dictated by our clients who often require a complete scope and cost estimate to authorize work. However, an Agile approach could be useful on some Aspect projects, especially when there are unknowns that the initial work will reveal and affect subsequent work. The incremental approach does occur at Aspect to a degree, such as environmental site assessments (Phase II ESAs occurring based on Phase I findings), and I’m using it on some data analysis tasks in the Ecology SAM Study on Stormwater Source Control that I’m leading.

A helpful, albeit intangible, take away for me was trying to adopt an Agile mindset when it makes sense for a project. Specifically, when the work lends itself to adaptive outcomes, flexibility, and the client is open to realizing project value along the way rather than just when the final report is delivered.

Anyone considering PMP certification should also know that the knowledge base is jargon-heavy (at times even pedantic), and a term in the project management world might mean something different in other realms. Sample alternate definitions in the PMP world include the terms: activity, process, risk, charter, coach, domain, quality, parametric, baseline, float, scope, and value—to name a few.

Walk us through the Big Test Day…

I registered to take the exam about a month in advance to get the date and time I wanted. The test is typically proctored at a testing center, though at-home testing was possible during the pandemic. The at-home testing was more restrictive with things like fewer breaks allowed and more complicated with verifying your home setup before the exam. So, I chose a testing center in Northgate (Seattle) that offered evening times so I didn’t have to miss work.

The testing area had about a dozen walled cubicles, each with a desktop computer. You can’t bring anything of your own into the test area: no food or drink, no pen or pencil, not even your own earplugs (they provide). You may take breaks to eat or drink in the lobby but the exam clock does not stop during breaks. The exam is closed-book and they give you a notepad to make notes during the exam, which you must turn in at the end. I was given a few 8x14 laminated sheets and some dry erase markers.

For the exam, you have up to 230 minutes to answer 180 questions, including breaks (the clock keeps ticking!). However, the exam is divided into three segments of 60 questions each, and you have to close out each segment before moving onto the next one. The goal is to answer each question as there is no advantage to leaving questions blank (blank = wrong). So, the exam is effectively three 60-question exams back-to-back and thus requires good time management.

Another good piece of advice I was given is to do a brain dump onto the notes pages as soon as you start the exam. For me, the brain dump was formulas, definitions, and reminders about how to estimate activity durations, calculate earned value, budget forecasting, and the differences among the many types of charts and their associated uses.

How did you feel when you got the results?

Big relief! As soon as you complete the last 60-question segment, there is a pregnant pause, and a moment later it reveals your result. The exam is pass/fail only and you don’t get a numeric score or know which questions you got right or wrong. The result given just as below target, on target, or above target. I was grateful to pass on my first attempt with an “above target” score in all domain areas!

What advice do you have for people looking to get their PMP?

My advice is to give yourself enough time to study (weeks or months depending on your schedule) and for the 35-hour prep course, which is given over 1 or more weeks depending on how it’s taught. Also, be open to learning the concepts as the project management world understands them, some of which may be different than you’ve experienced so far as a project manager.

20+ Years in the Making: Levee Sparks Dungeness River Restoration

On the Olympic Peninsula in Northwest Washington, the Lower Dungeness River Floodplain Restoration project restores habitat and natural river processes that are confined by various levees and dikes constructed in the 1940s through 1960s. The lower reaches of the Dungeness River have been constricted on the right bank by an existing 2.4-mile-long levee built in the 1960s by the United States Army Corps of Engineers (USACE). However, the USACE levee is ‘under-designed’ for anticipated flood events to come.

Aerial view of the 2,600-foot setback levee

Photo credit: Jamestown S’Klallam Tribe (JST)

Twenty years ago, the Lower Dungeness River Floodplain Restoration project was conceived with the goal of building a new setback levee and reconnecting the Dungeness River with its historical floodplain; improving habitat conditions; and restoring riverine processes and functions. The project was split into two parts: the Clallam County (County) levee setback project from River Mile (RM) 0.8 to 1.75, and the River’s Edge Project between RM 1.75 to 2.7. The County project started in 2015, but then the floodplain restoration work hit a standstill – until the Jamestown S’Klallam Tribe (JST) brought the River’s Edge Levee Setback project to life.

Jamestown S’Klallam Tribe Rebuilds a Floodplain to Restore the Region

For thousands of years pre-colonialism, the JST nurtured the land and many saltwater bays and freshwater rivers. Today, the JST takes an active role in community environmental projects, including participating in the Dungeness River Management Team and implementing habitat restoration projects such as this levee project, which is a part of the Lower Dungeness River restoration efforts.

JST purchased farmland along this stretch of the Dungeness River (with a strong show of support from local community members) with the understanding that the purchased land would be used for conservation efforts. JST secured funding support from Washington state’s  Floodplains by Design grant and brought on Engineering Services Association (ESA) to lead the project design. ESA in turn brought Aspect in to be the geotechnical lead, as well as several other key team members like WEST Consultants (hydrology and hydraulics) and Johnston Land Surveying.

The River’s Edge project will renew historical riparian habitat and boost the overall health of the ecosystem, including salmon recovery for key species like Chinook salmon, summer chum, bull trout, and steelhead. The new setback levee will also double as a walking path to be used by all members of the community.

Early Detective Work in a Floodplain Leads to Success

Rivers deposit soils in highly varied and complex ways. To set up the 2600-foot-long setback levee for success and understand the subsurface conditions, Aspect led a two-phase subsurface exploration program that included six soil borings (2 with vibrating wire piezometer installations), 11 test pit excavations, 13 hand-dug explorations, and 4 cone penetrometer explorations. Using this information we created a profile of subsurface conditions to power smart levee design.

Levees Need to Be Made of the ‘Right Stuff’

Nearby gravel pit that ‘fed’ the levee

Photo credit: Krazan & Associates

A key driver in any levee project is the availability of material. This levee was made up of over 37,000 cubic yards of gravel and sand. ESA identified a material source only two minutes away and Aspect and ESA tailored the levee design to make sure the material available from the gravel pit could be successfully used to build the levee to meet design standards. Having a material source so close to the Site helped save budget, time, and greenhouse gas emissions.

Finishing a 2,600-Foot Levee in Under Two Years: A Win !

Floodplain restoration without River's Edge Levee Setback project (on the left) and WITH River's Edge Levee Setback Project (on the right).

Photo credit: North Olympic Land Trust

Aspect collaborated with ESA, JST, and USACE to design the setback levee in just under one year, with construction of the project hot on the heels of the final design submittals. Construction then started and the new setback levee was built in just over 2 months!

In summer 2022, the existing levee will be removed to allow the Dungeness River to reclaim 56 acres of floodplain. The Clallam County project will eventually tie into the River’s Edge Setback Levee to open up an additional 87 acres for a combined 143 acres of reclaimed historical floodplain and habitat for salmon, birds, and wildlife.

The hard work and dedication of the River’s Edge project team helped realize the JST’s desire to create a quality setback levee that meets the latest and greatest safety standards, within their desired schedule – and underbudget!

The Path to Professional License: Ida Fischer, PE

In the science and engineering industry, seeing a “PE”, “LG”, “PMP”, or other initials behind someone’s name shows that person went through years of work experience that culminated in a substantial test to confirm the right to practice their area of technical expertise. Many go through this licensing journey but few outside that group know what the process is really like.

We’re telling those stories here. Aspect’s professionals are writing a series of articles that capture the trials and successes of studying for and receiving these career-defining milestones.

Ida Fischer, Professional Engineering (PE) License

Test: 5/17/2021  Awarded: 6/3/2021

Ida at Rialto Beach.

When did you start with your test prep?

My PE test timeline was largely dictated by COVID. I began studying in January 2020, and was rolling along when COVID struck and everything shut down. So, I put studying on the back burner until December 2020 with the goal of taking the test before summer 2021—since I was taking the Environmental PE test, which is administered on a computer, you have to schedule it based on testing center availability (rather than the biannual pen and paper tests). I started to feel the pressure and kicked my test prep into high gear mid-March 2021.

What were your study tactics? How did you get started?

Generally, for standardized tests (SAT, GRE) I like to review testing strategies, but I couldn’t find much discussion of strategy for the PE test any other than “study as much as you can.” Taylor Dayton generously shared her study materials with me, which included a box of various books, practice tests, and some notes. I don’t have an undergraduate in engineering, so I thought a comprehensive review book was a good option to make sure I saw all the possible topics. I worked my way through the entire book (PE Environmental Review by Lindeburg), then about a month before the test, I switched to practice problems. I also used flash cards to drill general info and problem types I was consistently missing. In hindsight, I think it would have been more time-efficient to focus on the problems and then read up on topics that weren’t feeling familiar rather than reading the entire book. Problems force you to engage with key concepts in a different way.

What should a person gearing up to do this know about the mental, physical, and social challenges of test prep?

For most people, studying is a significant time commitment which will likely impact all other areas of your life. It is important to set your own expectations and get the other significant people in your life onboard with what your studying is going to look like. My studying experience was largely impacted by COVID – I didn’t have to cut back on socializing in a significant way since I was already at my maximum Zoom capacity.

Mentally, you have to find a time when you are able study productively. This will look different for everyone – I was a hybrid after work and weekend studier. Physically, I was studying while concurrently training to cycle across Washington. I think the physical activity provided an important mental break. I benefitted from multiple routine activities reinforcing each other.

Walk us through the Big Test Day…

I woke up early enough to have time to have a good breakfast and coffee and allow for traffic on the way to the testing center, but not so early that I had any time to review or extra time to work up any nerves. The Environmental PE test is administered at standard testing centers, so there is the usual review of how to check in and out and use the computer. As I was working through the problems, I kept track of the ones I was confident in, those that I was less confident in, and those that I had to guess on. I had some extra time when I was done, so I reviewed all problems I was less confident in and some of the others as well. Overall, the test felt easier than I expected. On the way home, I celebrated with a cookie. That night before bed, I did not review my flashcards and that felt like relief.

How did you feel when you got the results?

While studying for the PE exam, Ida was also planning a cross-state bike trip. She and her dad and uncle rode from Seattle to Idaho over 6 days along the Palouse to Cascades Trail and smaller country roads. This picture is on PCT either along Keechelus Lake or Lake Easton (hard to keep track on the trail). She was on the trail when she found out she’d passed the exam.

I was delighted. I did a victory cartwheel even though I had biked 70 miles that day. The test results were supposed to be ready in about 10 days, so I had been checking my email even though I was on a bike trip and generally like to eschew email while on vacation.

What lessons did you learn that you’d want others to know?

I believe I could have achieved the same result (passing) with less studying. I think I was so concerned about the possibility of not passing that I didn’t weight the opportunity cost of the amount of studying I was doing.

Washington requires an application and Board approval to even register for the test. I put this off until the 11th hour and the application process was more work than I expected and consequently more frustrating than it needed to be. I’d say as soon as you’re thinking about taking the test, get the application out of the way.

Sitkas That tell a Story: Chelsea Bush to present at GSA conference in Portland

Rialto Beach, north of La Push along Washington’s active, dynamic Pacific coast, is home to a stretch of Sitka spruce trees that are teaching geologists about how shoreline forests react to and recover from large-scale storms. Staff Geologist Chelsea Bush, GIT, will present this at the Geological Society of America’s Connects conference in Portland on Wednesday, October 13.

rialto beach.jpeg

Her presentation, “Determination of Forest Age in a Coastal Setting Affected by Both Landsliding and Catastrophic Storm Events,” explores how she and her study group, part of her masters’ thesis at the University of Washington, started out trying to determine the age of the Sitkas in an effort to figure out when a landslide on site occurred. But after they’d researched Carbon 14 and LiDAR data, the results showed that the modern forest is younger than expected.

After further investigation, they determined that the diameter of the trees and the age of the trees weren’t related–most of the trees on site had been knocked down by the Olympic Blowdown of 1921 or had been shaped by other geomorphic processes. Understanding the true age of the trees will help geologist determine how they will respond to geomorphic or weather events and estimate how long it will take for the trees to succumb to erosion and fall to the beach below.

Chelsea and her team’s research shows that it’s easy to assume certain things about the age of a forest based on looks and the sizes of the trees – but when you look further, there may be more than meets the eye.

The Path to Professional License: Amelia Oates, LG

In the science and engineering industry, seeing a “PE”, “LG”, “PMP”, or other initials behind someone’s name shows that person went through years of work experience that culminated in a substantial test to confirm the right to practice their area of technical expertise. Many go through this licensing journey but few outside that group know what the process is really like.

We’re telling those stories here. Aspect’s professionals are writing a series of articles that capture the trials and successes of studying for and receiving these career-defining milestones.

Amelia Oates, Licensed Geologist (LG)

Test: Originally scheduled for March 2020 – test taken on October 20, 2020.

Awarded: November 25, 2020

Amelia Backpacking in Cispus Basin

Amelia Backpacking in Cispus Basin

Where did you start with your test prep?

I was originally scheduled to sit for the test on March 20, 2020. I was lucky enough to sign up to take it with a couple of my friends from grad school and we formed a study group, which made the whole experience a lot easier.

My first step was to gather all that info and wrap my head around it. I had the review course the National Association of State Boards of Geology (ASBOG) offers and their review book and accompanying practice test booklets, which circulate around to the aspiring geologists in Aspect’s Seattle office. I was lucky to have it; it had a lot of personalized touches from those who’d used it before – old flash cards and other helpful pointers.

Next I took the practice tests to gauge where I was at with the material. If I was really deficient in one area, I focused on that for my studies rather than that material I already knew and was already practicing in my day-to-day work.

How did COVID affect your test prep?

March 2020 was a super unknown moment – we were just about to be in COVID lockdown. The week of the test, Washington State put into effect the mandate that no group over 50 people could meet in person. Uncertain about what would happen, we frantically emailed ASBOG, who also run the test.

Two days before the exam, they announced that the test had been cancelled until further notice. That was jarring. We’d just spent so much time studying; we had been at it every weekend from January to March. The test is only offered twice a year, so they moved us all to October 2020.

How did you feel when you found out you’d be taking the test months later than expected? How did it change your study tactics?

I was mad. I had scheduled my test intentionally so I wouldn’t have to waste a beautiful Seattle summer studying, but then I was forced to do that anyway. I put off studying until about August, when I resumed reviewing the material in earnest – every night of the work week plus one weekend day.

Most of the general concepts I quickly recalled from my previous round of studying, but I found I needed to brush up on some of the finer details. Also, in the time between March and October 2020, I’d done a lot more intense technical hydrogeologic work at Aspect, where I was actually using the calculations in the example problems in real-world situations. That really helped clarify and solidify some fundamentals I needed for the test.

What was the best piece(s) of advice you got from others who’d done this before?

There’s a great collective of people at Aspect and in my cohort of grad school colleagues that had gone through this before. Getting their take on the test was really helpful. I heeded their advice to take the practice tests to set my standard, then grade myself to see how I did, take another midway through studying, then take one more right before the exam. These were good check-ins to focus my studies.

I also learned there are people who I respect as geologists who didn’t pass the test the first time. That was a serious turning point in my studying journey and showed me the importance of giving myself some grace in the moment, especially with COVID. I was able to step back and not be too hard on myself, no matter the outcome. I reassured myself, “If you don’t pass in October, it’s ok. This year has been so much more difficult than expected, and at least you tried.”

What should a person gearing up to do this know about the mental, physical, and social challenges of test prep?

Mentally, you need to prepare yourself to ingest a lot of knowledge. Some of it you may be learning for the first time, some of it you might just be refreshing, but you have to make time and space for that in your life. Prioritizing the studying over backpacking or other trips was initially a let-down, but ultimately helped me stay focused. I also enjoyed making a routine of studying—it helped me say no to social engagements and focus on the task at hand.

I was definitely physically stressed out during my year-long studying endeavor. When I was doing the bulk of my studying, I had a lighter workload with more flexibility. But the second time around, likely as a result of general COVID stress, I could tell my body was tense. Prioritizing walks, bike rides and runs here and there to clear my mind, and nourishing my body with all my favorite study snacks made everything much better.  

Study Graphic_Amelia.png

Thankfully, I was able to socialize as part of my test prep with my friend group, which was so beneficial to me through all of it. Zoom study sessions took the place of our pre-COVID 3 to 6 hours Sunday sessions, and having people to commiserate about the COVID parts of the experience was especially helpful.

Walk us through the Big Test Day…

The test was at the Red Lion hotel in Olympia. We checked in, they took our temperature and went over the protocols—a combination of COVID considerations and not-cheating-on-your-test considerations. There were about 30 other people in the room with us. We had to wear our masks and we were socially distanced at long tables, more than 6 feet apart. The social distancing and mask wearing was a different level of physical tax I wouldn’t have considered before 2020, and it brought a heightened level of awareness to every sniffle or cough in the testing facility.

The test is a four-hour exam. You have a calculator, a protractor, a pencil, some scrap paper, and that’s it. You have those four hours to answer to answer around 150 questions, on a classic Scantron. A lot of the test prep resources tell you to go through the whole test first, answer the questions you know, then go back to the ones you struggled with. I did this, but if there was a problem that I could narrow down to two answers, I just picked the one that seemed most logical. There were a few I was really unsure of that I skipped and came back to. I ended up finishing the whole thing about 20 minutes from the end.

After the test, we waited for each other in the parking lot and hung out with others who had also just taken the test. It was weird standing in the parking lot debriefing about what we’d just been through and asking each other what questions others found easy or challenging versus our own experience, especially given we seen this many people in the same place in months.

How did you feel when you got the results?

When the test was over, I immediately felt like I had failed. I remember thinking, “Oh, that was terrible!”  and feeling really despondent knowing how bad it would be to have to take the whole thing over again, given all the time I put into it. There were some questions where I thought, “Oh, wow ok, I could probably have studied a little bit harder.” Questions on concepts that I had never taken classes in or had struggled with before seemed more frequent than I wanted them to be. So I thought for sure, 100 percent, that I’d failed. 

It took a little over a month to get the results. I was out in the field at an excavation, and my friends who I’d sat for the exam with started texting me. They released the results in alphabetical order, so my friend with a last name at the beginning of the alphabet got her results and was trying to temper our expectations. It was two hours of not knowing—but when we all found out and we all passed, it was such a relief.

Any parting advice for those getting ready to take the test?

Be patient and compassionate with yourself through the process. It’s tenuous, and there’s A LOT of material to get through. Setting aside dedicated time each week was really important for my overall success. I recommend being organized, find your routine, and stick to it.

Groundbreaking Ground Improvements for Seattle Affordable Housing

Construction at Mt. Baker Housing Association’s Maddux Development is underway—the beginning of the end of a project that is bringing 203 units of affordable housing to Seattle’s Mt. Baker neighborhood. It features an innovative partnership between MBHA and Ecology as the first project under Ecology’s Healthy Housing program to help fund the environmental cleanup of future affordable housing sites. It also features a first-in-Seattle use of a ground improvement technique called displacement rigid inclusions to address the site’s challenging geology and the project’s limited budget.

Drilling the displacement rigid inclusions columns.

Drilling the displacement rigid inclusions columns.

Soil Liquefaction Muddies Building Design

The land under the new Maddux buildings consists of very loose fill soils that lie on top of glacial recessional deposits – a hodgepodge of loose soils left behind as the last glaciers retreated from the Puget Sound area thousands of years ago. Under that are stiffer soils that were consolidated by the weight of the glacier. The loose soils are saturated by groundwater that lies on top of it unable to infiltrate into the harder soil underneath.

During an earthquake, the saturated, loosely packed grains of soils at the Maddux site could be shaken to a point where the elevated water pressure within the pore spaces increases the space between grains and causes the soil to lose strength and flow like a liquid in a process called liquefaction.

Think of wiggling your toes in the sand while standing on a beach near where the waves come in—the Maddux site soils would respond in similar fashion. When the shaking starts, the loose soils would become even weaker and any foundation bearing weight on them would settle, crack, and potentially collapse. Structures on sites like Maddux require particular design for seismic conditions in order to be built safely.

Weak Soils Get an Automatic F

The building code divides the soils at sites into six classes – ranging from A (strong rock)  to F (weak, loose, liquefiable soils) – based on the characteristics of the upper 100 feet of soil from the base of any future building. These site classes set the parameters for how a building must be designed to respond to strong shaking from earthquakes.

The building code rates sites with any amount of soils at risk of liquefaction as Site Class F. Building on Site Class F sites usually requires either deep foundations or ground improvement—both of which are more expensive than conventional shallow foundations. The building itself can also be more expensive, since building on weaker soils often requires more steel and other materials. And for an affordable housing project like this one, cost is a critical factor to the viability of the project.

Conscious of these cost concerns, Aspect’s geotechnical team started to investigate the most effective foundation design for building on a Site Class F site such as Maddux. In a nutshell: It’s complicated.

Design vs. Complex Site Geology vs. Costs

This figure shows the varying elevations of bearing layer –soils that can safely bear the weight of a building foundation – at the Maddux site.

The land the Maddux site is on has been through a lot. The last glacier left not just weak soils but left them at wildly varying depths. You can drill at one spot and reach stiffer soils within a few feet of the surface, then move over 10 feet, drill again, and have the strong glacial soils be 15 or more feet further down.

Add to this the legacy contamination from former dry cleaners and a gas station that has since spread throughout the soil and groundwater. Excavation to remove contaminated soil was already part of the site’s environmental plan, but to extend that excavation to remove all the soft and liquefiable soils in addition to all the contaminated soils would have required more digging, deeper shoring, and more off-site soil disposal – and a lot more money. We also needed to make sure whatever ground improvement we used didn’t interfere with our environmental team’s remediation plan.

Whatever the method, we wanted it to be as cost-effective as possible. Ecology’s funding for the Maddux development only covers the environmental remediation. Any expense for building foundations is the responsibility of MBHA, which as a nonprofit has limited funding. Our geotechnical team carefully weighed the costs versus benefits of several options. For example, conventional deep auger cast piles, which are often used at sites like Maddux, are relatively inexpensive to install, but they require a lot of concrete and steel to construct, adding more to the cost of materials. They also don’t improve the ground around the piles; the class rating would still be an F, which increases the cost of the building itself.

Displacement Rigid Inclusions to Raise the Grade

As we weighed the factors, it became apparent that displacement rigid inclusions were the most appropriate and cost-effective technique for the site. Rigid inclusions are a ground improvement method that use columns of concrete to transfer the weight of a structure through loose soils down to more competent bearing soils below, thereby reducing potential damage from liquefaction.

What made the ground improvement for the Maddux project unique in the Seattle area was the use of displacement rigid inclusions. Displacement rigid inclusions are a type of rigid inclusion that involve specialty tooling that densifies the soil around each column. The act of drilling the columns “displaces” the ground around it. The soil between the columns is pushed together and becomes denser, thereby reducing the chance it will liquefy during an earthquake. Displacement rigid inclusions provide structural support for the building with the same element that is used to mitigate liquification.

Tests to Pass the SDCI Test

There aren’t many chances to test seismic design—the Seattle area hasn’t experienced a “design-level” earthquake, one with the magnitude we are designing our buildings for, in hundreds of years, so it can be hard to predict exactly how a building will respond. Instead, engineers study what has happened during other earthquakes under similar circumstances. We can then apply that understanding to safely develop innovative techniques to protect against earthquakes at more problematic sites like Maddux. To use displacement rigid inclusions for the Maddux project, the design required approval from the City of Seattle. Displacement rigid inclusions had never been used before to change the site class of a project in Seattle.

During design, we conducted cone penetrometer tests (CPTs) to determine the soils’ geotechnical engineering properties plus extensive laboratory tests on the soils. We worked with specialty ground improvement contractor Condon Johnson to assess whether the soils would respond to the displacement the way we thought they could. From those tests, the detailed ground improvement design was established including the spacing of each column needed to effectively strengthen the soil between columns.

Our team met regularly with Seattle Department of Construction and Inspections (SDCI) to present our design approach. Conservative estimates were developed for how much densification would be possible in the site soils. We found that the ground improvement could be designed to achieve adequate densification to eliminate liquefaction risk –and thus raise the site class.

SDCI approved the approach during design, but all was contingent on the results of verification testing after the rigid inclusions were installed. If we installed the columns and performed more CPTs that showed enough improvement in the soil strength, they would give final approval.

Installing the Columns

We started installing the displacement rigid inclusion columns at the Maddux site at the beginning of 2021. The drilling required specialty displacement auger tooling, and because this technique isn’t used much in this area, the driller had to bring the displacement auger up from California.

Displacement rigid inclusion installation in early 2021 at the Maddux site

Displacement rigid inclusion installation in early 2021 at the Maddux site

A cage of rebar is set in place after the column is filled with concrete.

A cage of rebar is set in place after the column is filled with concrete.

The displacement auger drilled 18-inch-diameter columns down through the weaker soils and into the underlying dense glacially overridden soil layer. As the auger pulled out, it pumped concrete into the void created by the auger pushing soil to the side. The concrete itself is under pressure, which pushed out the soil even more, which aides in densification. Once the auger was fully removed, a “cage” of rebar could then be lowered in to reinforce the concrete once it cures.

In all, there were 249 columns drilled at Maddux North and 219 at Maddux South, each placed about 5 feet apart center to center, installed over two months.

The Results

Once the displacement rigid inclusions were installed, we completed another round of CPTs to physically verify that we achieved the level of densification we predicted in design. Results from the post-treatment CPTs showed the displacement rigid inclusions had worked even better than we thought. Our team delivered the data to the City that showed the soils at Maddux were no longer liquifiable.

Aspect, as the geotechnical engineer of record, then gave the recommendation that the site class could change. This opinion was backed by the robust quality controls we used during construction, documentation of the verification CPTs, and post-treatment liquefaction analyses showing the liquefaction risk had been removed.

The Site Class at Maddux was raised from an ‘F’ to a ‘D’. A ‘D’ rating allowed for the structures to be designed using less materials, therefore saving money on construction costs.

The Maddux project represents a successful use of an innovative ground improvement technique on a complicated site in conjunction with an extensive environmental cleanup. See the Maddux ‘Story Map’ for more context on the project.

The Nooksack Adjudication: A Pivotal Washington State Water Story

In Fall 2020, after decades of unresolved conflict, Washington State made a decision to initiate a “general adjudication” on a key Northwest Washington watershed – the Nooksack basin in Whatcom and Skagit Counties. This means that thousands of water right users will be formally evaluated. What does this mean? In a word certainty. Certainty for the State of Washington, Tribal governments, and the water users themselves. Why is this happening now? It’s the most common water story in the West – there’s just not enough water to go around.

The Nooksack watershed is one of two areas (WRIA 58, including Lake Roosevelt, was the other one) recommended for adjudication.

The Nooksack watershed is one of two areas (WRIA 58, including Lake Roosevelt, was the other one) recommended for adjudication.

Adjudication – What is it?

An adjudication is a binding court Decree by the state whose end result is a comprehensive inventory of valid water rights. Put in simple terms it means that an Adjudication Court, with support from the Washington State Department of Ecology (Ecology), will methodically review all water uses in the watershed and confirm each water right has ‘valid’ water uses.

Why Now: What’s happening in Northwest Washington?

More rural development. Unquantified Tribal water rights. More water needs for agriculture in a growing part of the Pacific Northwest. Keeping water in the stream for fish. These competing demands often emerge as ‘whose water is this?’ battles in water rights. In Skagit and Whatcom counties, the adjudication is looking to bring certainty; however, there’s a lot of differing opinions on how to get there.

The Second Biggest Adjudication in Washington State History

Washington State is a ‘first in time first in right’ state for water law. Another way of saying it is if you were there first in using water, you are at the head of the line. That line can extend over a century in Washington state, and over generations if the water right passes on via property transfers. The Nooksack adjudication is potentially very big in scale.

The biggest one was in Yakima, and that took over 40 years to resolve including six Supreme Court cases. The schedule for the Nooksack will hopefully be more compressed, and Ecology plans to try out several time-saving shortcuts to make the process more streamlined.

Here to help as the State’s Preeminent Water Rights Firm

Aspect has consulted on literally thousands of water rights in Washington state in the last 10 years. We have also been involved in Nooksack water resources for more than a decade, including helping to lead the most recent watershed planning in 2021. We are looking forward to working with Nooksack water users.

Learn more here: www.nooksackadjudication.com

Aspect's Dan Haller Presenting at Upcoming Water Law in Washington Seminar

Join Aspect’s Dan Haller at the upcoming LSI Water Law in Washington Seminar on June 10-11. Dan will join a standout group of experts addressing some of the most pressing issues in Washington water law including watershed planning, water rights adjudications, municipal transfers and inchoate rights, Tribal water rights, droughts, and more. Dan’s presentation will provide a status update on the watershed planning process and RCW 90.94 compliance across 14 Washington watersheds. The Conference will be presented via live Interactive Broadcast. For more details visit the LSI website.

Reaching a Milestone for an Innovative Seattle Affordable Housing Project

The Maddux is a 200+ unit affordable housing project in Seattle that has been years in the making. After almost five years of work -- the environmental cleanup is essentially complete.

This project, in South Seattle’s Mt. Baker neighborhood, sat unused for decades. The culprit? Petroleum releases from an old gas station and solvent leaks from a former dry cleaner that severely affected soil and groundwater beneath the Site. The contamination issues prevented nearly all potential developers from touching these properties – the cleanup cost and environmental liability, which stretched across many properties, were just too much to manage.

Taking on One of the Most Challenging Sites in the City

Yet, Aspect’ s clients, Mt. Baker Housing Association, along with Perkins Coie, Washington State Department of Ecology (Ecology), and the City of Seattle saw an opportunity to build a new concept to turn brownfields into cleaned-up affordable housing.

Construction Begun with Move-in Anticipated in 2022

The earthworks, building design and construction team includes: Aspect, Beacon Development Group, Mithun, Coughlin Porter Lundeen and many others.

Some reasons why this project has happened:

  • Affordable Housing need in Seattle is great and this project commits to 200+ units near a walkable light rail station and within a mile of downtown Seattle.

  • Ecology provided “seed money” in support of an innovative idea – why not turn these blighted properties that no one would touch into affordable housing? A win for the environment, a win for the neighborhood, a win for housing, a win for transit and connection to downtown.

  • Ecology took the MBHA/Aspect/Perkins Coie innovative idea and created a new ‘Brownfield’ funding program (the Healthy Housing Program) because of this project to help affordable housing agencies develop prime real estate that has been overlooked.

  • But this isn’t all. The properties could liquefy in an earthquake. So, Aspect and the City of Seattle worked to design and permit a first-of-its-kind ‘earthquake proofing’ foundation system to facilitate economical, and safe, redevelopment of the property.

Construction Begun with Move-in Anticipated for 2022

  • The foundation engineering is ongoing as of Spring 2021.

  • The public will soon see the building “coming out of the ground” with anticipated move-in date in 2022 for families in the area.

Check out this ‘Story Map’ of the past 5 years of work to date:

The Path to Professional License: Mari Otto, PE

In the science and engineering industry, seeing a “PE”, “LG”, “PMP”, or other initials behind someone’s name shows that person went through years of work experience that culminated in a substantial test to confirm the right to practice their area of technical expertise. A professional license is a proof statement that communicates that the people charged with designing roads and buildings; solving water supply challenges; cleaning up contaminated soil and water; and successfully managing project quality are qualified and ethically accountable professionals. Many go through this licensing journey but few outside that group know what the process is really like.

We’re telling those stories here. Aspect’s professionals are writing a series of articles that capture the trials and successes of studying for and receiving these career-defining milestones.

Mari Otto, Professional Engineering License

Test: October 2020

Awarded: December 2020

Mari on the Skyline trail at Mt. Ranier

Mari on the Skyline trail at Mt. Ranier

Where did you start with your test prep?

I started thinking about my PE test early in 2020 when I was making my New Year’s resolutions (Item 1: pass the PE). I did a bunch of Googling to see what people were saying about the exam – there’s a lot out there (Editor’s note: including Aspect’s own License Prep Series!) Some people say you need 300-400 hours of study, some people say you barely need to study at all – it was a little overwhelming, but I figured I could find a happy middle somewhere.

I spent some time outlining everything I’d need for my test application and researching study materials. The Washington State Board of Registration requires you to submit an application with an engineering law review exam, proof of experience (including transcripts from school and an experience verification form signed by a supervisor PE), and pay an application fee before you are approved for the exam. I decided to get my application in and buy my study materials early (like, in July) so later on I could focus just on studying. I’m grateful that Aspect is very supportive of the PE process and I was able to expense all my study materials and application fee. Thanks Aspect!

I started studying in earnest in late August 2020 for my exam on October 23, 2020.

What was the best piece(s) of advice you got from others who’d done this before?

  • Do as many practice exams as you can.

  • Do the actual test in passes:

Pass 1 = Go through the entire exam and answer the questions you know how to answer quickly.

Pass 2 = Go through the exam again and answer the questions you know how to answer but will take more time.

Pass 3 = Review any remaining questions.

This strategy helped me because I wasn’t panicking during the exam. I could look at my answer key and have a good idea of what my percentage score would be for that portion of the exam. Building up my score early on helped reduce anxiety as the clock ran down.

What should a person gearing up to do this know about the mental, physical, and social challenges of test prep?

I initially tried studying after work so I could keep my weekends free. That plan unraveled pretty quickly. It just wasn’t sustainable for me to work a full day and then hit the books. If you can make that work for you, then great! But go into it knowing that unless you’re a superstar time manager, you’ll probably have to give up at least some of your weekends to studying. That being said, I found it was really important for me to rest between long study sessions.

My schedule generally followed this timeline:

  • Saturday: Practice exam (full 8-hour practice test)

  • Sunday: Rest day – go on a nature walk or do a water activity

  • Throughout the week: light practice problems if schedule allows

  • Saturday and Sunday: ~4 hours study sessions to review practice exam and study weak material. Prep for another practice exam the next week.

  • Repeat

I’m lucky that the people in my life had just the right mix of being understanding of my study schedule and being pushy enough to drag me outside every once in a while.

Walk us through the Big Test Day…

The test was in Puyallup, so I got a hotel nearby and got a good night’s rest before the exam. I woke up early and did some light stretches and ate some yogurt and fruits. I made sure that I had my lunch packed and that I had plenty of water and granola bar snacks.

I felt pretty well-prepared for the exam from all my practice exams, so I just took my time and did my best. It actually wasn’t too bad. During lunch, I had a great big salad and took a walk around the neighborhood and listened to a podcast. I made friends with a neighborhood cat on my lunch walk, so that felt auspicious.

After the exam, I drove home and had vegetarian burgers and beer and just chilled. It was great. I then took that Friday off for a long weekend trip down to the Oregon coast for some surfing.

How did you feel when you got the results?

I did my best to put the test out of my mind after taking it, knowing that it would be a couple months before I got my results. When I finally got my results in December and saw that green “Pass” icon, I felt a huge sense of relief and gratefulness – I could relax! It was the middle of a winter week during COVID-times, so I really went wild with my celebrations – I spent the evening drinking peanut butter whisky and watching Schitt’s Creek.

Mari study graphic.jpg

Any parting advice for those getting ready to take the PE?

  1. Lots of people love to talk about the PE and share their experience / give advice. I loved hearing people’s stories, but I found it important to not compare myself to others too much, ESPECIALLY when people talk about how many hours they are studying/have studied. You can listen to what worked for others, but in the end, you’ll have to find what works for yourself.

  2. I spent a lot of time at the beginning of my studies trying to do a deep dive into the subjects that would be on the breadth morning exam – it was NOT necessary. When I started doing practice exams, I noticed that the Geotech questions on the breadth exam were really basic. It’s reasonable to assume that the breadth questions for the other subjects would be considered really basic by someone who specializes in that particular subject. Realizing that helped me relax about the breadth exam – I identified common questions using the NCEES Examinee guide (use it - they tell you exactly what kind of questions will be on the exam) and used that to guide my breadth studying. It helped me to not get too into the weeds subjects that were not Geotech.

  3. Do lots of practice exams. The NCEES practice exam is the closest you’ll get to the actual exam. I did that exam at the beginning of my studies in late August and again at the end of my studies the weekend before the exam. I found other practice exams online. I took practice exams every other weekend and tried to simulate exam conditions – quiet environment, 4-hour morning exam, 1-hour lunch break, 4-hour afternoon exam. I even wore my facemask during my later practice exams to make sure I was used to having it on.

  4. In addition to the huge CERM book, I would recommend getting the little CERM Quick Reference. It has 99% of the equations you might need for the morning exam and probably like 60% of the equations you might need for the afternoon exam (at least for Geotech).

From Spokane Railyards to Vital Urban Core: Building the University District

In the past decade alone, the Spokane region has grown by 44,000+ people. The 2nd biggest city in Washington state is seeing an influx of residents and affordable housing is key to meet this need. As one piece to support the growth, “The District” is a 300-unit multifamily development planned for construction in 2021 and adds vital housing and connects Spokane communities.

The future ‘District on the River’ project.

The future ‘District on the River’ project.

Cleaning up a Waterfront Railyard Property

The District project — led by Sagamore Spokane LLC, located in Spokane’s University District — adds 300 units adjacent to the Spokane River. Cleanup actions will be completed prior to redevelopment of this former manufactured gas plant property and railyard area.. Aspect and teaming partners from Perkins Coie, DCI Engineers, Witherspoon Kelley,, and ALSC Architects developed a cleanup approach for the contaminated site allowing for building construction.

A Prospective Purchaser Consent Decree was entered by Sagamore Spokane LLC with the Washington State Department of Ecology for the agreed upon cleanup approach. Aspect and Perkins Coie were instrumental in working with Ecology and the Attorney General’s office to facilitate a pathway for Sagamore to invest in this brownfield redevelopment project.

Adding 300 Units to a New and Walkable University District

The cleanup actions are integrated with the development and will allow for the beneficial reuse of this notable vacant property contaminated by historical manufactured gas plant (MGP) operations. Completion of the cleanup actions will improve protection of human health and the environment, allowing this 300-unit, four-building residential apartment complex, known as the ‘District on the River’, to be completed.

With its prime location near the Spokane River, Ben Burr Trail, Hamilton Street bridge and close by amenities, this is anticipated to be a sought-after livable and walkable area.

The Future of Stormwater Management: MuniCon April 5-8 2021 - Part 2

Aspect is looking forward to discussing key stormwater management issues at this year’s Municipal Stormwater Conference April 5-8, 2021. Please join us in four (virtual) sessions where our stormwater team helps lead the discussion of the future of stormwater management in the Pacific Northwest. Please join us for Aspect presentations three and four (the first two Aspect presentations are summarized here)

 Stormwater Infiltration at Seattle-Tacoma International Airport – April 6

Protecting water quality is a key goal for SeaTac Airport’s stormwater program.

Protecting water quality is a key goal for SeaTac Airport’s stormwater program.

Join Tom Atkins, Principal Engineer, for a discussion on SeaTac Airport’s stormwater infiltration program that extends across 1,600 acres  of drainage area flowing into the Puget Sound and three local streams. The Port of Seattle –the steward for SeaTac Airport -- is interested in stormwater infiltration at STIA to achieve NPDES permit LID and flow control requirements along with GSI sustainability goals. Over the past four years infiltration has been investigated through shallow and deep infiltration feasibility assessments to guide the testing, analysis and design of BMPs for future development. This presentation will summarize the challenges, outcomes and tools that this work has produced, and will describe the deep infiltration testing planned for 2021.

How Shoreline Is Integrating ‘Salmon-Safe’ and the NPDES Phase II Permit – April 7 

In 2019, the City of Shoreline was the first in the state to achieve Salmon-Safe certification.

In 2019, the City of Shoreline was the first in the state to achieve Salmon-Safe certification.

Join Bryan Berkompas, Associate Hydrologist, to learn how Shoreline became the first city in Washington to achieve Salmon-Safe certification and how they are incorporating its requirements in City operations. Salmon-Safe guidelines are rigorous but also complimentary with many of the requirements of the NPDES Phase II permit. This presentation will discuss the process of achieving Salmon-Safe certification, the benefits of Salmon-Safe certification, and designing programs that satisfy the requirements of both the Permit and Salmon-Safe.

What if You Can’t Dig Your Way Out of a Brownfield Cleanup?

Brownfield site cleanups are difficult for construction teams, redevelopment plans, and the community. It’s even harder when you can’t dig and haul the contaminated soil and there’s impacts to groundwater. Aspect’s Adam Griffin and Doug Hillman discuss successful strategies for complicated cleanup sites in this Daily Journal of Commerce article.

Inspecting the Vapor Intrusion Mitigation System at Art Brass Plating in Seattle

Inspecting the Vapor Intrusion Mitigation System at Art Brass Plating in Seattle

Celebrating Key Watershed Plans in Spokane and Okanogan Basins

January 2021 launched great news for watersheds across Washington state – but first, let’s recap.

The $300 Million Watershed Law

In 2018, following water rights uncertainty that held up a $4 Billion budget in Washington State, the state passed the $300 Million Streamflow Restoration Act. The prime target was unlocking more water in a way that benefits habitat, communities, and agriculture and allows thoughtful development plans to proceed. Fast forward to 2021 and counties and basins across the state are seeing the outcomes of that law – most directly 6 out of 15 basins have updated watershed plans to date.

Status of Streamflow Restoration Grants and Planning Process
Source: Washington State Department of Ecology

Key Takeaways of Streamflow Restoration Act Results (So Far)

  1. Permit-exempt well impacts on instream flows and water right holders will be completely offset for the next 20 years.

  2. Local watershed partners have once again demonstrated they can collaborate on local solutions to water supply challenges.

  3. The plan adoption paves the way for shovel-ready projects to be implemented to benefit streamflow.

In three of those basins – Little Spokane (WRIA 55), Okanogan (WRIA 49), and Chehalis (WRIA 22 and 23) – there has been real progress on planning for the future water needs of the region. Aspect has worked for years on two of these (Little Spokane and Okanogan) and is excited to see the positive outcomes so far.

Little Spokane Watershed (WRIA 55) Plan Update

Headwaters of the Little Spokane River, near Newport, WA

Aspect has worked with Spokane County over the last several years to support watershed planning and management, including the development of watershed restoration projects. On January 28, 2021, Ecology adopted the updated Little Spokane Watershed Management Plan. This will mean:

  • Spokane County is in the process of completely offsetting permit-exempt well impacts and developing streamflow improvement projects totaling 4,085 acre-feet, including:

    • Purchasing water rights as mitigation

    • Building a Managed Aquifer Recharge project

    • Studying approaches for increasing storage in Eloika Lake to improve summer streamflows, combined with wetland and habitat enhancement

Okanogan Watershed (WRIA 49) Plan Update

Aspect has worked for years with Okanogan entities like Oroville-Tonasket Irrigation District (OTID) and others to lead up to this watershed planning update. This will mean:

  • The lead Okanogan watershed planning group -- WRIA 49 Planning Unit -- developed a two-tier list of projects to be adaptively managed to provide both consumptive use water offset and achieve Net Ecological Benefit in a manner consistent with the strong agricultural values of the community.

  • Two projects – Antoine Valley Ranch and Methow Beaver Project’s Restoring Streamflow after Wildfire in Okanogan and Methow River Subbasins – have been funded by Ecology and will be the first projects implemented following the adoption of the plan.

Aspect Welcomes Hydrogeologist Jay Pietraszek to Water Resources Team

Senior Hydrogeologist Jay Pietraszek joins Aspect’s Pacific Northwest-leading water resources team. Jay is a hydrogeologist with over 15 years of experience focusing on process-based assessments of water quality and water quantity for water supply, resource evaluations, and water management planning for commercial and industrial projects. He is based in Seattle, supporting Aspect’s Puget Sound clients as well as expanding Aspect’s water supply services throughout the Pacific Northwest.  

Jay Pietraszek, LHG

Jay Pietraszek, LHG

“As a firm founded by hydrogeologists, Jay’s background and expertise are an ideal match with Aspect’s water resources client base,” said Dan Haller, Principal Engineer for Aspect’s Water Resources Practice. “We’re excited to continue to build Aspect’s water resources team to be one of the strongest in the entire Pacific Northwest.”

Jay has performed extensive hydrogeologic analyses including site characterizations, water quality source assessments, evaluation of surface-groundwater interactions, pumping test analyses, well installations in complex hydrogeologic systems, production well design, and dewatering assessments for public agency, tribal, and mining clients. Pairing with his deep scientific know-how is Jay’s ability to translate complex ideas into clear communication and engage with regulatory and permitting bodies to move projects towards milestone goals.

“I’m excited to join the Aspect team and have the opportunity to work and collaborate with such a talented group of consultants,” said Jay.  “Aspect is one of the premier hydrogeologic consultancies in the region, with an excellent reputation for developing innovative and practical approaches to solve complex water resource challenges. I’m confident that Aspect’s core values and brand will provide a foundation for future success and opportunities, particularly as the demand for water resource-related services continues to grow.”